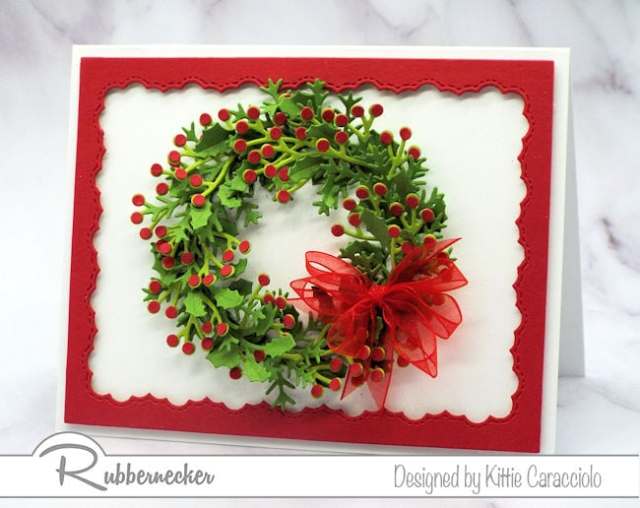
It’s not as hard as it looks to learn how to make a wreath with die cuts. I used a die specially made for this type of craft but once you know the basic steps and a couple of tricks, you can do this with many different die cuts and elements. And the results are always just gorgeous! To make this card I used the Rubbernecker Nested Scallop with Holes, Wreath Set and Greenery #1.
Making the Wreath
Yesterday I posted a card showing how to make a mini wreath. The steps to make this Christmas wreath are exactly the same only on a larger scale.
- Use green cardstock to cut the wreath base and several holly branches.
- Form the holly leaves using a molding pad and a leaf tool or gently bend them with your fingers.
- Begin attaching one holly branch to the base using glossy accents.
- Continue by adding a second branch and tucking the end under the top holly leaf of the first branch. Note: By adding the end of each branch under the top leaf of the branch before allows the glued ends to be covered.
- Keep adding the holly branches until the wreath base is covered.
- Use green cardstock to several sets of the greenery #1.
- Trim the individual branches off of each greenery branch.
- Begin tucking the small greenery branches in between the holly leaves to fill in the wreath.
- Use lighter green cardstock to cut several of the berry branches.
- Use a 1/8″ circle punch to punch lots of red circles to use as berries.
- Attach the red circles to the berry branches using glossy accents. Note: I placed all the red circles on my molding so it would be easy to slip the tip of my reverse tweezers under the circle to pick it up. It’s so much easier than trying to pick the circle up off my hard work surface.
- Trim the end off the berry branches to shorten so they will fit well in between the branches.
- Tuck the berry branches in between the holly and greenery branches and attach using glossy accents.
- Make a red multi loop bow attach it to the wreath using glue dots. Note: Check out multi loop bow video tutorial to see how I made this bow.
- Attach the wreath to the card base with a good amount of glossy accents. Tuck your paper piercer in between the branches in several spots and push down on the wreath base to make sure it is secure.

Now that you have some basic information on how to make a wreath with die cuts, go ahead and take a look at what you have in your stash, what you want to add and start making wreaths for all types of cards! It’s addictive and the recipients will be WOWed by your mad skills! Check out my spring wreath post to see a totally different kind of wreath made with large ivy and flowers but using the same steps as the one I shared with you today.
|
|
Learn how to make a wreath with die cuts.


STUNNING WORK, Kittie!!!! HAPPY THANKSGIVING!!!! ;)<3
Your wreaths are always so gorgeous, love how full they always are!