Learn how to extend a mini slimline die to get coverage for a full sized card!
Today I have a couple of great die cutting tips for you, including how to extend a mini slimline die to get more cutting coverage so you can use your favorite mini slimline dies on larger cards. It’s not hard to do and you can extend your crafting bucks big time when you start using your dies this way. I am also sharing how I make sure I get those beautiful embossed details on die cuts where they are baked into the design. Let’s get started!

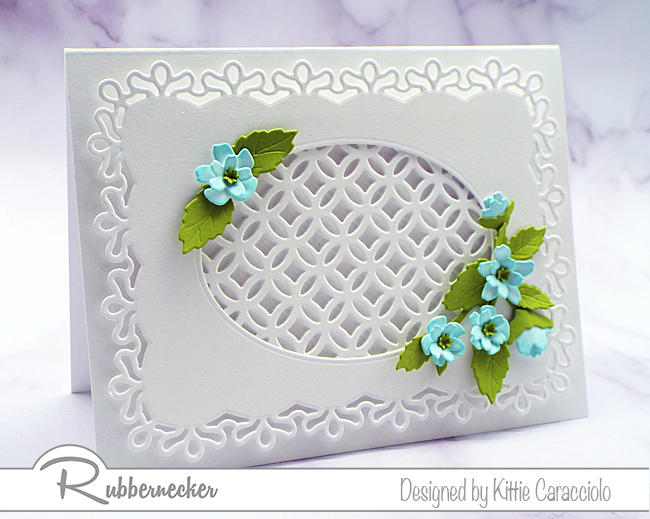
Card Base and Decorative Frame Layers
- Use white cardstock to cut an A2 sized card base, the Fancy Decorative Nested layer and a rectangle layer..
- Line up the oval die from the Nested Oval Die set on the decorative layer, secure it in place with masking tape and run through the machine to create the frame opening.
- Cut the rectangle layer using the Slimline Circle Lattice die. or the smaller Circle Lattice die.
- To extend a mini slimline die to get double – or more! – of the design you want to cut, simply cut your card stock once with the die. Then flip your material over and line up the die, cutting side up, under the material. Make sure that it is lined up in all the areas of the die to keep everything in alignment. You can add a couple of small pieces of low-tack tape (or ugly washi tape) to hold the die in place. Then run it through your die cutting machine again.

Now you’ve got extra coverage with perfect alignment. This is such an easy way to get so much more value out of your dies!

- Attach the Circle Lattice layer to the back of the frame using double stick tape.
- Apply strips of mounting tape to the back of the decorative frame layer and attach it to the card base.
The Flowers and Leaves
- Use white cardstock to the cut the Cherry Blossoms flowers and green cardstock to cut the leaves, tiny flower centers and Branch.
- Apply Beachside ink to the white flowers using a mini applicator.
- Form the flowers using a small round stylus and molding pad and the tiny flower centers using a small tipped stylus.
- Attach the smaller flowers and flower centers to the inside of the larger flowers using glossy accents.
- Adhere two leaves and one singe flower to the top left corner of the frame using glossy accents.
- Attach flowers and leaves to the branch using glossy accents and then attach them to the lower right corner of the frame.

My second tip, which you can see beautifully here, is to experiment with shims when you are cutting with dies that have details built into them to add embossed details like the veins on these leaves. Often people will just cut and find those details a little lackluster. Adding a shim will increase the compression in your die cutting machine and will yield deeper, crisper embossing. Start with regular printer paper and work your way up to thicker elements if you need to. Each machine has different compression so once you’ve determined what works best in yours, make a little note with the die, or better yet, slip the shim in with the die where you store it and be ready to “roll” at a moment’s notice.
If you find that you need to use shims often, or just want cleaner die cuts, you may want to purchase something I find to be indispensable – the Magic Mat from Scrapbook.com. Swap out one of your plastic cutting pads for this sturdy self-healing pad and you’ll be amazed by the cleanest cuts you’ve ever achieved.

|


|


Now you know how to extend a mini slimline die cut to get more bang for your supply bucks AND get those delicious embossed details to really stand out. Aren’t you feeling so good about “discovering” even more value in your cardmaking supplies?
I thought you’d show a video of how you did it. I’m a show me person.