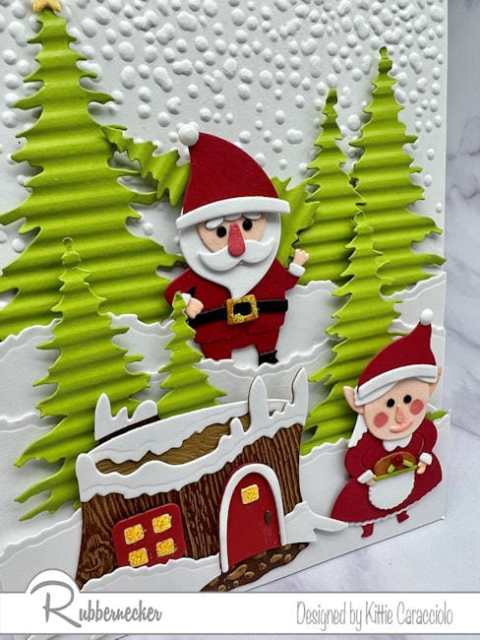
With a fun Santa & Mrs. Claus twist, these gnome Christmas cards will crack you up!
I get a kick out of gnome Christmas cards so when I saw the new Garden Gnome and Garden Gnome House die sets from Rubbernecker, I knew I had to make a little Santa and Mrs. Claus card using them as the characters. I used the Deckle Hills, Evergreen Trees and the tiny star from the Christmas Mini set to round out the details and I have all the steps for you below so you can make one, too!
Card Base and Snow Layers
- Cut an A2 sized card base and a 5.50″ x 4.25″ layer using white cardstock.
- Emboss the white layer using the Snowfall embossing folder and attach it to the card base using double stick tape.
- Cut three Deckle Hills snow layers using white cardstock.
- Apply double stick tape to the two back snow layers and attach them to the card base.
- Adhere a strip of mounting tape to the back of the front snow layer and attach it to the base.
The “Santa-fied” Garden Gnomes
- Cut the Garden Gnomes using red, white and black cardstock.
- Color the faces and face parts using a skin colored markers and attach the pieces using Connect glue.
- Attach Santa’s face, mustache and nose to the top of the white beard section using Connect glue.
- Attach the hat pieces together and attach to the heads glossy accents.
- Assemble the body and clothes sections and attach them together using glossy accents.
- Use rolled up double tick tape to attach the heads to the bodies.
Gnome House
- Cut the Gnome House sections using tan woodgrain cardstock.
- Apply a darker shade of brown ink to the front trunk section and a lighter shade for the inner tree section using mini applicators.
- Cut one Deckle Hills section using white cardstock, turn it with the decorative edge face down and cut out the bark edge and roots sections. Pro Tip: I used the Deckle Hills to cut the outer bark sections to make them look like piled up snow and attached them using glossy accents.
- Use red, white and yellow cardstock to cut the door and window sections.
- Insert the yellow window sections inside the red window and attach them to the back using double stick tape.
- Attach the window and door to the trunk using glossy accents.
Finish the Scene
- Use green cardstock to cut the Evergreen trees and run them through the straight crimper to add dimension.
- Tuck the trees in behind the snow layers and attach them using pieces of mounting tape.
- Attach the smallest tree to Santa’s back (it’s hard to see) using glossy accents and attach him to the scene using a piece of mounting tape.
- Use pieces of mounting tape to attach Mrs. Clause and the house to the card base.
- Cut a tiny star from the Christmas Mini using yellow cardstock and attach it to the tallest tree using glossy accents.
- Finish by applying touches of yellow stickles to the star, belt buckle and window.
Rubbernecker has quite a nice selection of Gnome die and stamp sets. Here is a link to several of my Gnome Projects if you would like more inspiration. And here are the things I used today to make this charming card:
|
|
I love that I was able to put a special twist on these gnome Christmas cards thanks to the details in the die set. And I can’t wait to add these cute Garden Gnomes to some spring projects as well!


they are so cute and fun!
Great card, I love the tree technique!