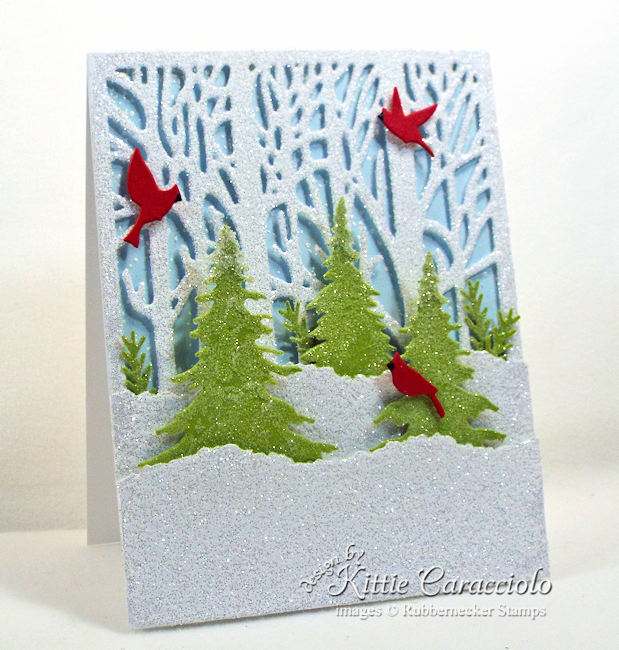
Today I’m sharing a sparkly winter scene Christmas card. In truth I think I went a little to over the top with the glitter but I had lots of fun making it. For my project I used the Rubbernecker Stamps Tree Panel #3, Evergreen Trees, Deckle Hills, Greenery #1 and Cardinals. The snowy background was made using the Splatter Background. I covered the white trees and snow layers using the Nuvo Pure Sheen Ice White Glitter. I covered the trees and greenery using Ranger Rock Candy Glitter. My glue of choice for applying glitter is Crafter’s Pick Ultimate Glue.
Cut and Glitter the Images
- Cut the tree panel and snow layers using white cardstock.
- Use green cardstock to cut the evergreen trees and branches.
- Apply the glue to the top half of the tree panel and snow layers using your finger and sprinkle with the Ice White glitter. Note: I had to work fairly fast to get full coverage of glue over the tree panel so it wouldn’t dry out. before I applied the glitter.
- Use your finger to apply glue to the evergreen trees and branches and sprinkle with the Rock Candy glitter.
- Allow all the images to dry well before assembling the card.
The Falling Snow Background
- Apply white pigment ink to the Splatter Background stamp and stamp the blue background layer.
- Sprinkle white embossing powder over the background and heat with the heat gun.
Assemble the Winter Scene Christmas Card
- Apply strips of mounting tape on the back frame border of the tree panel and to a few key spots on the back of trees.
- Attach the tree panel to the blue card base.
- Attach the back layer of snow to the tree panel using double stick tape.
- Apply strips of mounting tape to the back of the front layer and attach to the tree panel.
- Tuck the trees and branches in behind the snow layers and attach using glossy accents.
- Finish by cutting the cardinals using red cardstock, color their beaks using a black marker and attach to the scene using small pieces of mounting tape. Note: The glitter is not very friendly to adhesive so I reinforced the small pieces of mounting tape on the birds with a glue dot for extra sticking power.
Here are the dies and stamp I used for my project.
|
Here are the tools and supplies.
|
This glittery winter scene Christmas card was lots of fun to make even though I did go way over the top on sparkle. LOL! If you want more winter scene Christmas cards inspiration you can check out this Pinterest link. I sure do appreciate you coming by and I hope you have an enjoyable day.


NAH!!!! LOL I LOOOVE ALL the glitter!!! It makes for a frosty cold winter morning! Sometimes, things look like this in the winter!!! 😉 A GORGEOUS CARD, Kittie!!!!!!!!!!!! ;)<3
Kittie, what a lovely card! Very Christmasy. Thank you for sharing and inspiring us continually.